A little coding can go a long way

It is a truth universally acknowledged among bioinformaticians that 90% of the stuff that bioinformaticians do is to convert files from one format to another. One tool outputs format A, and the next tool you want to use needs format B as input. As a consequence, there is a slew of different file format conversion tools out there, and a google search done at the time of writing returned about 2.5 million results on the search sentence “bioinformatics file format conversion”. A personal favorite of mine for format conversions is the “seqret” tool which is found in the EMBOSS package. Yes, it has been around the block for a while, but it will do most of the things that are needed. That tool, together with some unix commands, such as sed, awk and grep can usually get you pretty far along where you need to go.
However, every once in a while a format and a need for a specific output comes along, and it just turns out to be easier to throw some code at it, rather than to make bash hacks (Yes, I know many count bash hacks as code, and sometimes it can be. However, for most people it just isn’t). This was the situation I found myself recently. I am working with some folks to look at virulence genes in a specific set of genomes. Now, there are a lot of ways of doing that, but in 98% of all cases, this comes down to good old BLAST. The main way of doing this is to take the set of genes you are looking for and blast them against your genomes. Then, apply some filters on said blast results, and there you have it. Most specific gene finders (which is what I call MLST finders, resistance gene finders, virulence finders, and whatnot-finders) work in this way. However, some of them are easier to install and use. And in my case, more importantly, for some of them it is easier to understand how to create your own set of genes to look for. In this case, I did not do that, but that is likely to happen later. Thus, tools that allow me to do that without having to jump through too many hoops are preferred. In this case, enter abricate, a nice little perl tool written by Torsten Seeman fits the bill nicely. Yes, it is perl, which can be an install nightmare, but there is sensibly a conda package that allows you to skirt those issues. Thus I proceeded to run my analyses. Lo and behold virulence genes were found, and there was much rejoicing.
Then came the next question: could I get the gene sequences of the genes found by abricate out of the genomes somehow? My collaborators suspect some foul play might be going on here. Now, this is what the format of abricate output files look like:

As you can see, this is a normal tabular output format, not too different from what you see in other situations. In order to extract the gene sequences, I would need to grab the genome sequence, find the contig the gene we are thinking of is in, then cut it out of the contig in question using the start and stop positions, and stuff it into a fasta file. Now, cunning readers might look at the format and think “bedtools“or “seqkt”, and they would not be wrong. To use those, you would need to have one file per genome that contained the results of the search. Then you would need to use something like awk to grab the contig column, as well as the start and stop columns and the strandedness of the sequence. However, seqtk can’t use the strandedness, so there goes that option. Bedtools can use it, so that could work. But, it looked like doing that would be a lot of work. Also, in all likelihood, the people I collaborate with would want to extract several different genes. Thus I would need something that would be quick and easy to do whenever the situation should arise. Also, coding is a lot more fun than putting together less-than-reproducible bash hacks. Thus my tiny little python script called “abricate-extract.py” was born. Now, the code is not pretty, and it is not very well documented, but it does work. It showcases the fact that another favorite of mine, biopython, is very useful and can save you a lot of time. Also, sometimes classes just make sense. The script takes in an abricate output file and the gene you are looking to extract, and extracts that from all of the genomes the analyses found a match on. This will then be put into a fasta output file for all to enjoy.
There you have it, hope you found this useful somehow!
Bioinformatics training at the Norwegian Veterinary Institute

Earlier this month, I got something that most academics regard as something akin to a miracle – I got steady employment. I now have a work contract without an end date!Earlier this month, I got something that most academics regard as something akin to a miracle – I got steady employment. I now have a work contract without an end date!

I’ve now been working at the Norwegian Veterinary Institute for two years. These have been two very good years, I’ve had opportunity to work on many interesting projects.  The Institute has quite a broad portfolio of responsibilities – it is tasked with diagnostics, surveillance, monitoring, risk assessments and giving scientific advise to the government on a whole slew of issues. Considering the inroads into various fields that bioinformatics and sequencing have been making the last 10 years, it is not surprising that this now has come to the Institute as well. However, it has also gradually been noticeable that I am the only one at the Institute that can do the things that I do. I have at times become a roadblock.

So, in good Software Carpentry tradition, I’ve been working on training people. This fall we are now able to put this training on a more formal footing – we are starting up a year-long course aimed at training around 20 people to become for the most part self driving bioinformaticians. And, again in good Software Carpentry tradition, I am writing about it in case somebody has feedback and/or would like to do something similar themselves.

The course is slated to run for about a year, and we’ve estimated that people will use approximately one day a week on participation. The course will proceed in two distinct stages, with an introductory lecture series followed by a hands-on practical course

Open introductory lectures
The first part of this course consists of a lecture series that is open to all at the Institute. This series is meant to give people unfamiliar with bioinformatics and sequencing an introduction to what bioinformatics is, what kinds of problems you can solve with it, how to design studies, the methods that are involved in analysis, and so forth. This part has already started, this week we are continuing with the 3rd lecture in the series.

After the open introductory part, around 20 people will be selected for further participation in the practical part.  This part of the course will proceed in four stages:

Bioinformatics infrastructure workshops
The Institute is a pure windows shop. Thus, most of the people here have little to no experience working within the kind of infrastructure that is commonly used for bioinformatics. Due to the pure windows shop factor, we have chosen to use the HPC resources at the University of Oslo for analyses. To interact with the UiO systems, we have opted for going with windows laptops with virtualbox on them, with a biolinux image. That will put the learners on a unix platform with tools that can be used when/if needed while also enabling easy interaction with the HPC cluster. However, to effectively use this kind of a setup, our learners need to know quite a few things. Thus we will be introducing them to VMs, how to use the shell, and how to interact with the UiO computers (including the queueing system). We will also teach them a bit of basic R and python programming. Fortunately, we don’t have to invent the wheel ourselves here – Software and Data Carpentry has a lot of already existing material that we will use for this part. This part is planned as whole day hands on workshops.

We will subsequently divide the participants into three working groups. Not all people are interested in the same kinds of things, and it takes time to learn something properly. Through discussions with people at the Institute, we have figured out that people are primarily interested in comparative genomics, transcriptomics and metagenomics. Each separate group will have their own mentor. From this point onwards the workshops will be one half-day every week, with homework.

Case study workthrough
Once the common infrastructure part is done, we will have the students working in their separate groups. They will first be working through a case study that is known to their mentor. They will work through that case, and through that become familiar with common analyses within their fields.

Working with their own data
They will then proceed to working with their own data, solving their own specific problems. This work will be done under the guidance of their mentor.

Writing up a paper
We have also decided to include writing up a paper based on their own data into this course. Getting the figures and the tables created is one thing, and writing it up and formulating the results is something else. It can be hard to figure out exactly what your results are saying, and thus we decided to include that in the course too.

As is evident from the description above, this is quite an extensive program. I am very happy that I will not be doing this on my own. The Institute has hired two people in 20% positions to work on this with me. The others are Arvind Sundaram, who works at the Norwegian Sequencing Centre, and Thomas Haverkamp, who is at the Biology department at the University of Oslo. During this year, I will be mentoring the comparative genomics group, Arvind will be mentoring the transcriptomics group, while Thomas will be mentoring the metagenomics group.

All in all, I am very exited that we are able to start this course now, and I look forward to help upskill people at my Institute. However, I also have to admit that it is bit terrifying being responsible for the further education of this many people. But, we have to start somewhere, and I am fortunately not going it alone (another thing that Software Carpentry has taught me). I’d also very much like to hear from people who have done similar things, even if on a smaller scale. I also aim to write about this regularly here, to get more feedback and possibly help and inspire others who would like to do similar things.

Lecture on bacterial typing and whole genome data

A week ago, I was at a workshop in Denmark. This was for a Nordic Working Group for Microbiology and Animal Health and Welfare (NMDD) meeting on Source attribution of Campylobacter in the Nordic countries. We were around 12 people or thereabouts, mostly from the modelling side of the source attribution table.

Since starting my new job at the Norwegian Veterinary Institute in July, I have finally had time to focus something that I have found quite fascinating for some time, and that is how to use whole genome data for tracing bacterial infections. The Campylobacter source attribution project has as its goal to figure out how to use MLST data gathered from the Nordic countries to elucidate which reservoirs the human Campylobacter cases in these countries stem from. This merges very nicely with my interest in using whole genome data for such purposes.  My contribution to this workshop was a presentation concerning how whole genome sequencing is making its way into bacterial typing. I am including the slides from this meeting in this post.

[gview file=”https://blog.karinlag.no/wp-content/uploads/2015/12/2015-12-09_NMDD.pdf”]

Through this meeting I got a very useful insight into how the modelling side of these issues work. However, I also discovered that not everybody present were necessarily completely aware of the “shifty” nature of the bacterial genome, and by extension the characteristics of the MLST data the modelling within the project is done on. To alleviate that, I added more about what a bacterial genome actually is in the beginning, and also added more about horizontal gene transfer towards the end. In working with these things on the eve of lecturing, I was very happy to have the assistance of the twitter community, which helped me dig out details such as the rate of horizontal gene transfer in Campylobacter (heck, it apparently even happens with core genes, can’t we trust anything anymore?), which proved very useful in the discussions.

Comments and thoughts are very welcome!


Teaching Software Carpentry workshops – some tricks of the trade

These days I am gearing up to teach two more Software Carpentry workshops, one in Wageningen, Netherlands, and one in Oslo, Norway. In the Netherlands workshop I will be teaching a module that I haven’t even looked at before. This led me to think about the things I do to prepare for a workshop. So, here is a list (in no particular order) of things that I do that others might find useful.

  • Go through the instructor checklist. Have a look at the other checklists too, that helps with figuring out what you can expect of the other parties involved in the workshop.
  • Recently, all of the workshop modules have been put into their own github repos. Go sign up for notifications for those that you are teaching. It is highly likely that discussions about the material will prove useful. These can contain both information about technical issues and about how to teach that particular module.
  • Go through your module(s) on as many platforms that are available to you. If you are thusly inclined, consider creating a virtual machine or two and go through both the installation procedure and the module there. Remember, this takes time, so start before you think you have to, there will always be weird hickups.
  • Print out a copy of the lessons on paper and make notes on them as you go along. Take them with you to the workshop. During my first workshop I did not have a printout, and it was not a pleasant experience trying to switch back and forth between windows. I don’t know if I or the students ended up being the more confused.
  • Have a look at the wiki for technical issues and familiarize yourself with the latest technical annoyances.  Ensure that you have an easy way to get back to it again during the workshop. I have forgotten where it is a couple of times, and it was equally annoying each time having to spend time figuring out where it was.
  • Make sure that the host supplies stickies, and consider taking a backup stash with you in case the host misplaces them or simply did not get them because they didn’t believe in them. Ensure that you have at least twice as many stickies as students, sometimes they lose them, sometimes they spill coffee on them, sometimes they distractedly end up tearing them into tiny tiny little pieces. You get the picture.
  • During the workshop – USE THE STICKIES! They are a lifesaver. If you have not taught with them before, just give them one single go and that should be enough to convince you. It is a lot easier to keep track of where people are with them than without, you can keep a higher speed through the material without loosing anybody, and it is a lot easier to see who needs help. It also saves students sore shoulders since they don’t have to keep their hands up in the air until they fall off. On a more serious note, I suspect students ask for help more quickly with stickies since the overhead cost associated with it is reduced – it is not very taxing to put a stickie on your screen.
  • When you are live coding (typing on your computer) for the entire lesson it is tempting to sit down. Consider teaching standing up instead. It helps with speaking clearly and loudly enough so that people can hear. I also suspect that instructors may be quicker to go and help people when teaching standing up, because you don’t actually have to get up first. If you decide to teach standing up, tell the organizer so that they can fix something to have the computer on.
  • Bring good walking shoes. If you enjoy wearing heels, leave them at home. You are likely to do a lot of standing up and walking about, both during the workshop and in the evenings. You do not want to end up teaching with blisters. Also, you are likely to be walking around in a room with a lot of extension cords and leads lying on the floor. The risk of tripping over something is already higher than normal.
  • Bring throat lozenges or cough drops or whatever they are called, and a bottle of water. You will end up speaking a lot more than you are used to, which might lead to a sore throat, coughing and in a worst case scenario, losing your voice. I once got a coughing fit while teaching and it was not a fun experience.
  • If you can, try to get together with the helpers, the other instructors and the organizers the evening before the workshop. It really helps to have met before the workshop. Everybody, especially the helpers, are bound to have questions about things, questions that won’t have occurred to them until they are actually talking with others involved in the workshop. This is also good for giving last minute information, ensuring that everybody knows where and when to show up, organizing transport etc.
  • Ensure that you get to the workshop in plenty of time in the morning. The building you are teaching in might be confusing to navigate, so give yourself enough time to get there. You will then also have time to set up your own computer, sort out your papers etc.
  • Last but not least: have fun!

So there you have it!

The one where I went to Sweden

I spent some days two weeks ago in Stockholm, Sweden. Lex Nederbragt and I were invited by SciLifeLab to teach a Software Carpentry workshop there. This coincided with the very first PyCon Sweden Conference, and as the organizers would have it, I got to present a talk.

The workshop

The workshop went very well. Lex and I taught the by-now fairly well known novice workshop (if you want one at your institution, let them know!). Oxana Sachenkova, the local organizer, had also set up an intermediate workshop. The teachers in that one were Konrad Hinsen and Nelle Varoquaux, both flying in from Paris. Their workshop focused more on object oriented programming and intermediate git use. It was great meeting them, the only sad thing is that I could not sit in on their workshop

The division of labor between Lex and I have until now been that he teaches shell and unit testing, while I teach git and python. This time I taught both these parts from the new lesson material that has been developed. I had taught the git lesson earlier once before, so that material was well known to me. I think this lesson is reasonably easy to teach, the real challenge is to convey to the students why version control is useful at all. At this stage I am leaning towards most people not really understanding the need for version control before they have either messed up their work pretty badly, or have become involved in a joint development project.

I had not taught the python lessons before. These now take place entirely in the iPython Notebook. The first time I went through them, I actually wondered if I should return to the old lesson material, if nothing else because on the printout I had somewhere around 50 pages to go through. On the second run through, however, I realized that the notebook is a game changer. With the notebook, I could have the students editing and copy-paste code from earlier in the lesson, which would reduce the typing time and hence the teaching time dramatically. There were still things that I cut from this lesson – I did for example not go through he python call stack, simply because I still think this is too complicated for novices. Instead, I teach them the basic tenant “What happens in a function, stays in a function”, and that does seem to stick.

The conference and my talk

Due to teaching I only got to attend the last day of the conference. The programme looked really nice, and I got to see some really great talks. The morning of the last day opened with Laurens Van Houtven speaking about cryptography, and Jackie Kazil speaking about how she started using programming in her journalism and how that lead her to new pastures. After lunch there were several other talks, most of which were pretty technical. Such talks can be really good, but to me they lose their value when they don’t even have a 3 minute “subject of my talk for dummies” intro. 

My talk was at the end of the day, and was entitled “Python and Biology: a shotgun wedding” (pardon the pun, when the title appeared in my head, resistance was futile). The background for the talk was that I have several times during the last couple of years helped people – primarily biologists – start programming. Naturally, as opinionated as I am, I have ended up with some do’s and don’ts on where to start. I also included a bit of background on why life scientists have had to get into this game, and also showed some examples. I have included the slides below.

[gview file=”https://blog.karinlag.no/wp-content/uploads/2014/06/pyconse_blog.pptx”]

The talk seemed to be fairly well received – it was however aimed at novices, and there did not seem to be too many of those in attendance. I did however see some people nodding vigorously in the front, and got some really nice questions at the end, so all in all I think it went over well.


Basic bioinformatics python course, part II

This is the second part of the python bioinformatics course that I have taught biologists. This module is about control flow and how to handle input and output. Control flow is needed in mainly two different situations, either that a decision based on data has to be made, or that a piece of code should be repeated.  In Python, decisions are made using an IF statement, while iterations (repeating code) are done with either a FOR loop, or a WHILE loop. How to handle input and output from files is also described –  in most cases that is where the data in question is to be found, and it is easier to keep track of results if the program prints the results to a file.

[gview file=”https://blog.karinlag.no/wp-content/uploads/2013/10/FlowIO.ppt”]

Logging your work

I often collaborate with biologists on different projects. Sometimes I do most of the bioinformatics stuff, but most of the time I try to help them do the work themselves. There are two main reasons for why I prefer this route. First of all – self preservation. There are too many projects out there that are interesting. If I were to do all of them myself, I would drown. Second – I enjoy teaching. It is fun seeing somebody understanding things and managing to do something new.

There is however one thing that I try to teach that I am beginning to think can only truly be learned after having botched things up. This is the importance of logging your work. I myself had to learn this the hard way. During my early PhD years I designed a tiling microarray chip for one specific bug. Six months later, I was asked to do the same thing again, but for a different bug. I thought that this would be a breeze. After all, I had done this before, hadn’t I? I went back to my notes, and to my horror discovered that I could not for the life of me reproduce the files that I had produced for the initial bug. I did know the programs that I had used, and also some of the settings, but no matter how I tweaked things, I could not get the same results. Since my previous design had not yet been put into production, I ended up redoing the entire thing for both bugs, and this time I meticulously wrote down the entire process. This time I knew that if we got good results and could publish on it, I would actually be able to tell how I designed the chip and why.

I often tell this story when I talk with biologists about logging computational work. I usually get a lot of nods from those listening, and I know that at least some of them will actually start logging their work. I am uncertain though of how many actually stick with this habit. Many people seem to think that they can trust their own memories. Don’t get me wrong – there are probably people out there who are capable of remembering in great detail how they did an analysis. But, I do not believe that this goes for the great majority of scientists. I believe that for most people, the only way of keeping track of what was done and why is to write it down.

An additional complication is that I believe that many when they first get their data do not really see a reason to log what they do. Most people start just exploring their data, making some graphs and tables just to see what the data looks like. In my opinion, this exploratory data analysis phase is vital – it gives the researcher a feel for the data that in my experience can be essential to discovering errors in both the data and the analyses. However, I think that for many, this exploratory data analysis phase silently and without fanfare slides over into a final production phase. Results that were initially produced in a “let’s just see what this looks like” fashion end up being used as figures and tables in the final paper without a real track record of where the results came from.

Creating a new habit can be difficult. Writing down what is done to the data and why can seem tedious and may seem like just a waste of time. However, instead of just saying “log your work” in a stern voice, I thought I would hold out some of the more tangible benefits that a good log can provide. Your mileage may vary, but if there is no log, these benefits will certainly not be available.

  • Error detection. If you know what you did, it is easier later to discover what went wrong if there is something in the results that do not add up. It can be very easy to write 2 instead of 3 in an option setting, and when working with sequences, ATGGC is very close to ATGCC.
  • Internal reuse of methods. Maybe you have a different data set to run on, or just want to change some small elements in the analysis. If the current procedure is already written down, reusing and changing it is a lot easier. For some people this spells writing a script for running an analysis, but even just a cut-and-paste sequence of commands can go a long way.
  • Writing the materials and methods section. If the results are good, you will want to publish on them. If there is a written log stating how the results were produced, writing the M&M section should be a walk in the park.
  • Defending the results in reply to a reviewer. A reviewer might ask questions about the analyses. If the log files detail not only how the results were produced, but also why various decisions were made, it is easier to respond to questions about the whys and the wherefores of the analysis.
  • Reproducibility. In theory, all science should be reproducible. If it is not reproducible for the one creating the results in the first place, nobody else can reproduce it either. If your work is reproducible by others it might not benefit you directly here and now, but may increase the citation rate of your paper. Many people dislike citing papers where they are not quite certain of what was done.

The last question is then what should be logged and how to keep a log. In my logs I usually note things such as:

  • program versions
  • program options
  • location of files
  • file versions. Calculating a check sum can go a long way – use for instance md5sum.
  • urls for where files were downloaded from, together with the download date
  • thoughts about results and solutions and discussions about how choices were made. 

For a long time my own logs have simply been a dated journal where I copy-paste commands, links to files, md5sums of input and result files, and where I discuss with myself the reason for my decisions. I keep this in a plain text file. I have tried other solutions that allowed me to paste in pictures, and which would let me import pdfs and other documents, but the plain text file still sticks with me to this day. This file can be read on any computer, does not require special software to open, and is easy to keep track of. I do know of those that use Evernote for this, and others again that use TiddlyWiki. The technical solution behind a log is in my opinion not all that important. The really important thing is that it should be something that is easy for you to use, otherwise it just becomes another barrier to writing things down. Keep it simple, keep it easy, and in the end the log will work for you.

‘Sorting out Sorting’

There are times when my nerd shows more than usual. I recently found a movie on YouTube that that brought back a lot of nerdy memories from my studies. I got my bachelor and masters degree at the University of Bergen. I really liked chemistry and biology, but I also really liked computers. My father had shown me the joy that could be found in putting together a computer without the manual without any blue smoke appearing. The consequence of this was that I studied both molecular biology and computer science.

The movie in case is one that used to be shown in the last lecture in the ‘Data Structures and Algorithms’ course. This movie was made in 1981 and illustrates nine different sorting algorithms using fairly hefty graphics for the time and has a very distinct plink-plonk sound track. The tradition among the students was that when this movie was shown, we would show up with biscuits in the shape of letters, and rødbrus, which is a soda primarily made for children. We would then during the movie sort the letter biscuits using the algorithm that was currently shown in the film.  At the end, when all of the algorithms were shown at once and are racing against each other, we would all cheer for bubblesort. I do believe that somebody at some point actually made a banner in support of bubblesort.

So – in case you have been sitting there wondering which sorting algorithm is the fastest – sit back and enjoy. For my part, I have to go find some biscuits and rødbrus.

RNAmmer 1.2 install issues

RNAmmer is getting on in years, but it is still heavily used, something that we, the authors deeply appreciate. However, it is not always easy to install. Here, I describe what needs to be done in order to get it up and running.

Path changes

The changes that have to be introduced are to be found in this section:

## PROGRAM CONFIGURATION BEGIN

# the path of the program
my $INSTALL_PATH = "/usr/cbs/bio/src/rnammer-1.2";

# The library in which HMMs can be found
my $HMM_LIBRARY = "$INSTALL_PATH/lib";
my $XML2GFF = "$INSTALL_PATH/xml2gff";
my $XML2FSA = "$INSTALL_PATH/xml2fsa";

# The location of the RNAmmer core module
my $RNAMMER_CORE     = "$INSTALL_PATH/core-rnammer";

# path to hmmsearch of HMMER package
chomp ( my $uname = `uname`);
my $HMMSEARCH_BINARY;
my $PERL;
if ( $uname eq "Linux" ) {
        $HMMSEARCH_BINARY = "/usr/cbs/bio/bin/linux64/hmmsearch";
        $PERL = "/usr/bin/perl";
} elsif ( $uname eq "IRIX64" ) {
        $HMMSEARCH_BINARY = "/usr/cbs/bio/bin/irix64/hmmsearch";
        $PERL = "/usr/sbin/perl";
} else {
        die "unknown platform\n";
}

The program was in the first place written to be run on the servers at the Danish Technical University, hence the $INSTALL_PATH setting. This should be set to wherever you keep your RNAmmer installation. In my case, I am setting it to /home/karinlag/projects/rnammer, since I am here having it as a local install in my home directory.

The next thing that has to be done, is to get the right HMMer installation and to figure out where perl is.

You will need version 2.3 of HMMer, which you can download from this location. Download it, and read the INSTALL instructions. It should install cleanly on most *nix systems.

I installed hmmer-2.3 in /home/karinlag/src, where it created the directory hmmer-2.3. Inside the src directory you will find the hmmsearch program. Set the $HMMSEARCH_BINARY variable to point to the hmmsearch program. Note: you need to check what the command uname tells you to figure out what system you have so that you know which of the if clauses to modify things in. If it does not say Linux or IRIX64 (which is unlikely these days), you will need to set either the Linux string or the IRIX64 string to what you have, and set the paths below accordingly.

You also need to check that you have the right perl path. You can figure that out by doing ‘which perl’.

You should now be able to do

perl rnammer -S bac -m lsu,ssu,tsu -gff - example/ecoli.fsa

and get results.

Posix errors

You may end up with errors that say something along the lines of 

FATAL: POSIX threads support is not compiled into HMMER; --cpu doesn't have any effect

If you get this, you need to find the following in the core-rnammer script:

system sprintf('%s --cpu 1 --compat ...... and so on

Remove the two instances of –cpu 1 (not the whole sentence, just ‘–cpu 1’), and you should be good to go.

XML/Simple.pm

You might end up with having RNAmmer complain about not being able to find XML/Simple.pm in @INC. To solve this, you need to install perl-XML-Simple. Installing perl modules is something I consider to be deep voodoo, so I won’t even try to describe how to do that. Refer to your system to figure that one out.

Other errors?

If you discover other errors than those I have described here, let me know in the comments!

Basic bioinformatics python course, part I

bassibook

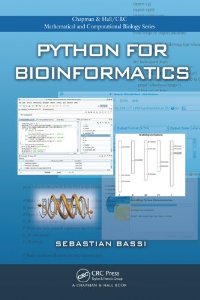
I have on several occasions had the privilege of teaching basic programming to biology students. My preferred language in this situation as in many others is python. I have also been fortunate enough to find a book which I think does a fairly good job of teaching basic python in a way that biologists find useful. In this context that mostly means dealing with sequences in a sensible way. The book in question is “Python for Bioinformatics” by Sebastian Bassi.

The only note here is that there are some spelling mistakes in it, and that it is from 2009. Python has progressed to Python version 3 now, whereas the book is at version 2. However, for a beginning programmer, this should not make too much of a difference.

I am here putting out the slides that I used for a one-day intro course for biologists. The course is very interactive, meaning that in the slides there are  many short exercises which are followed by the answer. I am in this post putting out the first set of slides that deal with the basics, the rest will follow during the next couple of weeks.

Note: I have tried to ensure that these slides are bug free, but there are bound to be some mistakes somewhere. Please let me know if you spot any!

Enjoy!

Part 1: The basics

The first lesson begins with discussing programming a bit, and the two modes in which python can be used – interactively and batch mode. I then go through the basic datatypes in python, i.e. what kind of “things” that are available. I cover how to use python as a calculator, how to work with strings, and also what a list and a dictionary is and how to use them.

[gview file=”https://blog.karinlag.no/wp-content/uploads/2013/10/Basics.pdf” save=”0″]